

customer chat interface must be enabled by your account manager before you begin to use it. This chat client is just one element of the chat channel. Configuring chat for your contact center is a multi-step process.
These tasks are only needed if you want to deploy a custom chat experience. Choose whether you want to use a V1 or a V2 profile. You don't need both.
Create a Chat Profile
You can create multiple chat profiles for an extra-customized experience, however, you need only create one to set up the customer chat interface. Decide if you want to use a V1 or V2 chat profile, then follow the correlating task below.
Create V1 Chat Profile
Required permissions: Chat Profiles Create
- Click the app selector
 and select ACD.
 - Go to Contact Settings > Chat Profiles.
- Locate the chat profile you want to modify and click it to open it.
- Click Edit.
- Enter the Profile Name.
- For Interface, select V1 ASPX from the drop-down. Once you have saved a profile, you can no longer edit this field.
- Configure the Color Scheme.
 Learn more about the color schemes
Field
Details
Color Scheme The system color scheme in use. You can use one of the following templates as is, or modify it to meet your company's needs.
- Default: Gray with blue and white.
- Color Scheme 1: Blue with white.
- Color Scheme 2: Orange with yellow and white.
- Color Scheme 3: Red with gray and white.
- Configure the style settings for the chat window, using the Preview area to view your updates.
Learn more about the logo image
Field
Details
Logo Image You cannot add a logo to an existing chat profile. If you create a chat profile without a logo and later decide you want to include a logo in the customer chat interface, you must create a new chat profile and assign it to the appropriate point of contact. - Configure the settings for the chat dialogs, using the Preview area to view your updates. You can change the background color and font color for agent and contact dialogs, but only the font color for system messages. System messages are typically driven by Studio actions like Quemsg and appear in the chat interface with no container.
- Configure the settings for the chat status indicators and messages, using the Preview area to view your updates.
- Click Done.
Create a V2 Chat Profile
Required permissions: Chat Profiles Create
- Click the app selector and select ACD.
- Go to Contact Settings > Chat Profiles.
- To create a profile, click Create New.
- Enter a Profile Name.
- For Interface, select V2 (HTML5). Once you have saved a profile, you can no longer edit this field.
- Configure the Appearance fields as needed, using the Preview to view your updates.
- If you want to, enable and configure a pre-chat form.
- Select the Enable Pre-Chat Form checkbox.
- Modify the Welcome Message as needed.
- Configure the fields as needed by selecting Add Field.
Contents submitted using this form are passed to the Begin action of your routing script as parameters starting with the entry P0.
- If you want to, enable and configure the Waiting Queue window.
- Select the Enable Waiting Queue checkbox.
- Enter a Waiting Message. If the Studio script associated with this profile uses the Quemsg action to let customers know their place in the queue, that message alternates with the message you configure here.
- If you want to, change the color of the background and tone of the text.
If you want to, add a logo by selecting the Logo checkbox and then doing one of the following:
- If you already uploaded the logo to NiCE CXone for another purpose, select Select Existing. Click Browse and locate the image in the Select File window. Click the image to select it. Click OK.
- If you want to upload a new logo, select Upload New. Click Choose File and locate the image you want to upload. Click the image to select it. Click Open.
If you want to, add a larger image by selecting the Hero image checkbox and then doing one of the following:
- If you already uploaded the image to NiCE CXone for another purpose, select Select Existing. Click Browse and locate the image in the Select File window. Click the image to select it. Click OK.
- If you want to upload a new image, select Upload New. Click Choose File and locate the image you want to upload. Click the image to select it. Click Open.
You should size your logo or image before uploading it to NiCE CXone.Otherwise, the logo or hero image is stretched to fit the specified maximum size. Logos and images must be SVG or PNG file types.
- If you are creating a profile, click Save.
Add Point of Contacts to a Chat Profile
Required permissions: Chat Profiles Edit
- Click the app selector and select ACD.
- Go to Contact Settings > Chat Profiles.
- Locate the chat profile you want to assign to points of contact and click to open it.
- Click the Points of Contact tab.
- In the Add Points of Contact table, select the checkboxes corresponding to the points of contact to which you want to assign the chat profile. If you want to assign this profile to all points of contact, skip this step.
- Click Add Points of Contact. To assign the chat profile to all active chat points of contact, click Add All.
Embed and Customize Live Chat V2 (HTML5) in a Webpage
<script type = "text/javascript" src = 'http://hc8.ucnlabext.com/inContact/ChatClient/js/embed.min.js'></script>
 <script type ="text/javascript">
 function showBadge( i) {
  var divBadge = document.getElementById("divBadge");
	if(i>0) {
		divBadge.innerHTML=i;
		divBadge.style.display="block";
		divBadge.classList.add('badge2');
	}
	else if(i==0 && divBadge) { divBadge.style.display="none";}
  }
  var dimensions = {top:20,left:200,height:50,width:600};
  icPatronChat.init(
	{
	  serverHost:'http://home-b2.incontact.com',
	  bus_no:50,
         poc:'c7744b03-fe43-437f-a464-aec52e56f683',
	  params:['FirstName','Last Name','first.last@company.com',555-555-5555],
         customChatButton: true
	},
    showBadge);
 icPatronChat.setDimension(dimensions);
</script>
- Click the app selector and select ACD.
- Go to Contact Settings > Point of Contact.
- Select an existing or create a new point of contact.
- Copy the code located at the bottom of the page.
- Paste the copied text at the end of the
<body>section of your webpage. -
If you want to replace the default live chat icon that appears on your website, add the following to the script you pasted in your website:
-
Add the following to the script, just below the
<script type ="text/javascript">line:function showBadge( i) { var divBadge = document.getElementById("divBadge"); if(i>0) { divBadge.innerHTML=i; divBadge.style.display="block"; divBadge.classList.add('badge2'); } else if(i==0 && divBadge) { divBadge.style.display="none";} } -
Add the
.badge2class to your website's CSS and style the badge effects on the custom live chat button how you want them. -
Add the following highlighted code to the
icPatronChat.initcode block:icPatronChat.init( { serverHost:'http://home-b2.incontact.com', bus_no:50, poc:'c7744b03-fe43-437f-a464-aec52e56f683', params:['FirstName','Last Name','first.last@company.com',555-555-5555], customChatButton: true }, showBadge);paramsis an array of strings that pass to the Studio script at run time. It can send a maximum of 10 custom query parameters, including pre-chat form fields. -
Add the custom button with HTML, just after the
</script>tag. The link must includeonclick="icPatronChat.setStateWindowToggle()". See the following example:<a class="button2" onclick="icPatronChat.setStateWindowToggle()"> <span>Live Chat</span><div id="divBadge" class="badge2"></div> </a>
- Save the webpage and test it. Make changes as necessary.
-
-
If you want to customize the size and position of the live chat window on your website when a contact opens it, do the following to the script you pasted into your website:
-
Above the icPatronChat.init line, add the following code block:
var dimensions = {top:20,left:200,height:50,width:600}; - Set the
topandleftsettings to the number of pixels from the top and left side of the browser window you want the top left corner of the chat window to be positioned on your website. - Set the
heightandwidthsettings to the number of pixels high and wide you want the window to be when a contact opens it. -
Add the following line just above the
</script>tag.icPatronChat.setDimension(dimensions);
- Save the webpage and test it. Make changes as necessary.
-

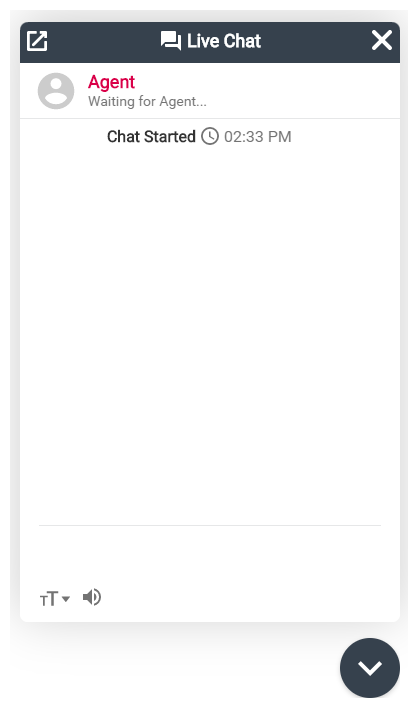
Add a Customer Chat interface Pop-Out Window to a Webpage
These instructions work for both V1 (ASPX) and V2 (HTML5) chat profiles.
- Click the app selector and select ACD.
- Go to Contact Settings > Chat Profiles.
- Select an existing or create a new point of contact.
- Copy the Point of Contact URL.
-
Add these lines of code to the end of the <body> section of your webpage. Replace the highlighted text with your URL.
<script type = "text/javascript">
  var popupPatronChat = function() {
    var url = "https://home-c4.incontact.com/inContact/ChatClient/ChatClient.aspx?poc=815f0de7-f189-4f6a-b272-4ffbcf80c0b&&bu=50&P1=First Name&P2=Last Name&P3=first.last@company.com&P4=555-555-5555;
   window.open(url, 'icPatronChatWin', 'location=no,height=630,menubar=no,status-no,width=410', true);
  };
</script>
The parameters after the URL is an array of strings that pass to the Studio script at run time. You can include up to 10.