Page Details: Timed Schedules
Overview
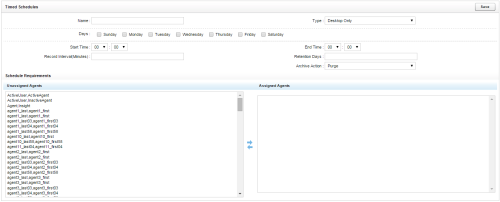
The Timed Schedules page enables you configure settings for timed schedules in your inContact WFO system. Schedules are collections of business rules that govern recordings in inContact WFO. Timed schedules are used to record agent desktops when there are no associated call events.
For more information, see Recording Schedules Overview.
Timed schedules are not available in Hybrid deployments.
- Name
- Allows you to assign a meaningful name to the schedule for the benefit of other users. Names do not have to be unique, but using the same name for multiple schedules may be confusing.
- Type
- Allows you to select the schedule type from the drop-down list. The available value is Desktop Only.
- Days
- Allows you to select checkbox(es) for the day(s) the timed schedule will be in effect.
- Start Time
- Allows you to set the time each day that the schedule will begin using hour and minute selectors. For example, to start recording at 8:30 AM, set the first selector to 08 and the second selector to 30. To start recording at 2:00 PM, set the first select to 14 and the second selector to 00.
- Record Interval
- Allows you to establish the length in minutes of each recording made under this schedule. The field accepts whole numbers.
- End Date and Time
- Allows you to set the time each day that the schedule will end using hour and minute selectors. For example, to end recording at 5:00 PM, set the first select to 17 and the second selector to 00.
- Retention Days
- Allows you to establish the number of days for which recordings should be kept until the first archive action is implemented. The field accepts whole numbers.
- Archive Action
- Allows you to select the first archive action to be applied to recordings made under this schedule. The field accepts values from a drop-down list of all archive actions in your system.
- Schedule Requirements
- Allows you to select the agents who should be assigned to this schedule by using the left and right arrows to move them from the Unassigned Agents column to the Assigned Agents column and vice versa. You can select multiple agents using standard Windows methods.
