

Use Dispositions
If configured by your administrator, you can use dispositions![]() Result assigned by the agent or system at the end of a voice (disposition) or digital (status) interaction. and notes in Salesforce Agent (SFA) during the contact. The screenshot on this page references the voice workspace, but dispositions can be used on any skills
Result assigned by the agent or system at the end of a voice (disposition) or digital (status) interaction. and notes in Salesforce Agent (SFA) during the contact. The screenshot on this page references the voice workspace, but dispositions can be used on any skills![]() Used to automate delivery of interactions based on agent skills, abilities, and knowledge. that are configured for them.
Used to automate delivery of interactions based on agent skills, abilities, and knowledge. that are configured for them.
If your administrator has configured Personal Connection preview dialing, you may also be able to disposition a contact before the dialer connects the call.
-
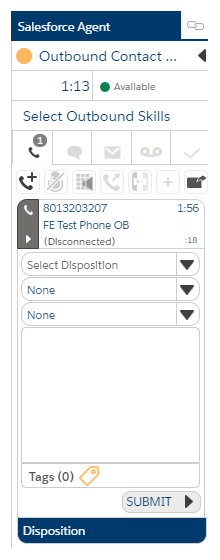
At the bottom of the contact workspace, select the Notes tab.
- Select a disposition from the Disposition drop-down.
-
If you want to, add notes about the contact in the blank space above the Disposition drop-down. If your administrator has enabled Automated Summary (AutoSummary), a call summary automatically appears in this field.
-
Continue to update your notes or change the disposition as needed throughout the interaction and during the after contact work
 State that allows an agent to complete work requirements after finishing an interaction.. If a disposition is required, the disposition timer starts as soon as the contact ends to keep track of how long you've spent on the disposition.
 -
Click Submit.
Use Tags
Tags add another level of classification for contacts, independent of the disposition. Tags may be used to track specific attributes of contacts or to add information beyond what is allowed in dispositions. There is no association between tags and dispositions, so you may choose to use each independently or combined. When you receive a contact on a skill for which tags are defined, you may select one or more tags, as appropriate. The screenshot in this topic references the email workspace, but tags can be used on any skill that are configured for them.
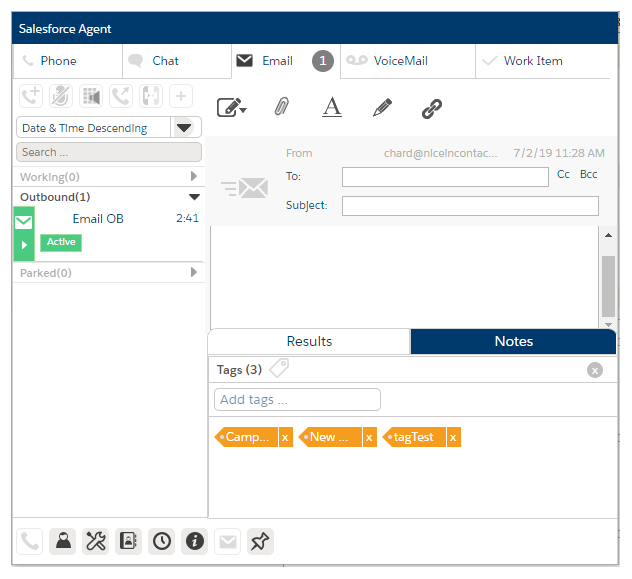
- Click Notes > Tags.
-
Click Add Tags.
-
If necessary, search for a specific tag by typing the first few letters of the tag topic and select from the list of search results. Click the tags you want to add to the contact. Because the list is dynamic, the added tag no longer appears on the list of options for this particular contact.
-
Add as many or as few tags as necessary and appropriate for the contact. There is no need to save or close tags, and applied tags are saved when the interaction is complete and saved.
-
To remove a tag from the contact, click Tags and then click the X to the right of the selected tag.
-
When you are done selecting tags, click X to close the tag window.
Switch Between Contacts
You can switch between contacts without having to end the interactions. This allows you to assist more than one contact at a time. Depending on your settings, after accepting the second interaction:
-
It will automatically pop out in a new window.
-
You can manually open it in a new window.
You can switch to the second interaction by clicking on the new window. You can return to the previous window at any time to resume the first interaction.