

This page is for Cloud Storage in AWS. If you use Cloud Storage Cloud Storage in Azure, see the Azure storage section of the Cloud Storage Services online help.
Required permissions: Long-term File Retrieval Edit, Create, or Delete
To retrieve files from long-term storage, you need to create a retrieval job request. File retrieval is a billable feature. To ensure that you are billed only for the files you need, use the filter options to narrow your list based on contact ID, ANI![]() Also known as caller ID. Listed phone number of an incoming voice call., or DNIS
Also known as caller ID. Listed phone number of an incoming voice call., or DNIS![]() The number dialed on inbound or outbound voice calls..
The number dialed on inbound or outbound voice calls..
Retrieved files remain in active storage and accrue any applicable charges until the specified return date. For more information about billing for file retrieval, contact your account representative.
Chat and email files can be retrieved from long-term storage using the agent, team, and skill filters. Interaction Analytics (CXone) report files can only be retrieved using the date range filter.
Create a Retrieval Request
-
Click the app selector
 and select Admin.
 -
Click Cloud Storage > Long-term File Retrieval.
-
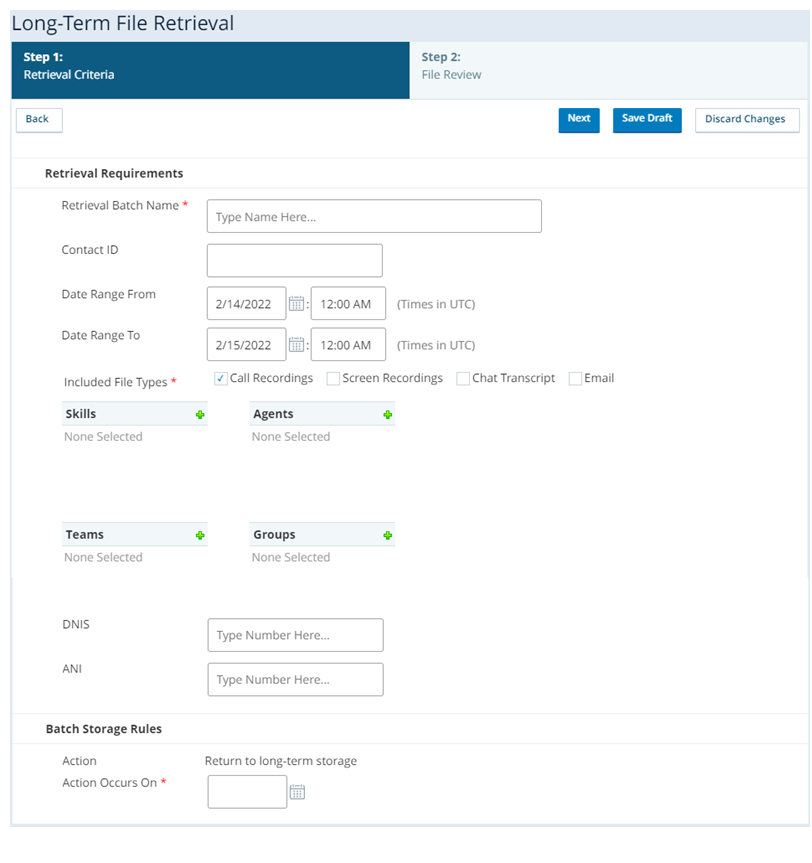
Click Create New.
- Enter a
 Learn more about fields in this step
Field
Details
Enter a unique, descriptive name for the set of files you want to retrieve. Contact ID Enter the ID of a specific contact. You can retrieve up to 10 files per batch by entering multiple contact IDs separated by commas.
For example: 123456789012,987654321098,567890123456
If you see a special character error as you enter a comma, ignore it and continue adding contact IDs. As long as the field value ends with a contact ID and not a comma, you can submit the form.
Date Range From Enter or select the starting date of the period you want to retrieve files from.
Ensure that the date and time ranges are correct. You cannot modify them after you save the retrieval request.
Time Enter or select a time to further limit the range you want to retrieve files from.
Ensure that the date and time ranges are correct. You cannot modify them after you save the retrieval request.
Date Range To Enter or select the ending date of the period you want to retrieve files from.
Ensure that the date and time ranges are correct. You cannot modify them after you save the retrieval request.
-
Learn more about fields in this step
Field
Details
Included File Types
Select the type of files you want to retrieve. Choose from Call Recordings, Chat Transcripts, Email, or Screen Recordings. At least one type is required. DNIS/To Address Enter the DNIS
The number dialed on inbound or outbound voice calls. or To address to filter based on the recipient. You must prepend the number with +1 or +<countryCode> to see results. In some cases, you may need to prepend a \ to see results.
ANI/From Address Enter the ANI
Also known as caller ID. Listed phone number of an incoming voice call. or From address to filter based on the sender. You must prepend the number with +1 or +<countryCode> to see results. In some cases, you may need to prepend a \ to see results.
Skills Select one or more skills to limit your retrieval to those skills. Agents Select one or more agents to limit your retrieval to those agents. Teams Select one or more teams to limit your retrieval to those teams. Groups Select one or more groups to limit your retrieval to those groups. Click the + icon, then select a group in the Available column and click > to move it to the Selected column. When you're finished adding groups, click Done. -
Under Batch Storage Rules, specify the date when you want the retrieved files to return to long-term storage. Retrieved files accrue any applicable charges while in active storage.
- Click Next.
- Review the number and size of the files of a retrieval request based on the criteria you entered, then click Retrieve Files to complete the request, or Save Draft to save and return to it later.
Cancel a File Retrieval Request
You can cancel file retrieval requests that are submitted by mistake. You can only cancel requests that haven't started processing yet. You cannot cancel a request after processing has started.
- Click Cloud Storage > Long-Term File Retrieval.
- Select the file retrieval request you want to cancel.
- Click the three stacked dots icon
 > Terminate Retrieval.
 -
Confirm you want to cancel the file retrieval request. The request is terminated.