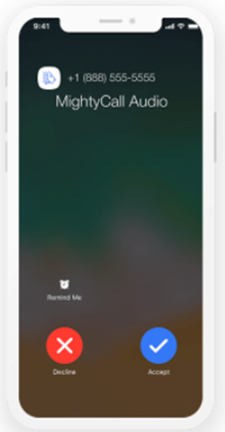
Universal Call Branding lets you provide caller ID text for your outgoing phone numbers. Your contacts see the text along with your number when they receive a call from your organization. Universal Call Branding enables you to display up to 32 characters on the recipient's mobile phone display. This improves your answer rates because contacts are more likely to answer calls when they know where it's coming from. Universal Call Branding is similar to Caller ID Name (CNAM), but it's designed for mobile phones and carriers that don't display CNAM reliably. Universal Call Branding is currently only available in the United States.
Set Up Universal Call Branding
To use Universal Call Branding, you must have it enabled for your environment. Contact your Account Representative for details. Once it's enabled, you can place an order for caller ID text for each of your outgoing phone numbers in the Customer Community portal. Orders for Universal Call Branding process automatically without a case being created and processed for it. If you use both Caller ID Name (CNAM) and Universal Call Branding in your account, you will notice that CNAM requests process differently from Universal Call Branding orders. CNAM orders have a case created for them to be processed by NiCE personnel.
- If you haven't already done so, contact your Account Representative to enable Universal Call Branding for your environment.
- Log in to the NiCE CXone Mpower Customer Community.
- Go to Technical Services > Orders.
- Click the Caller ID option.
- Select an Account. Click Next.
-
Enter the Calling Number your environment calls from. Then, in Caller ID Name, enter the text you want contacts to see with your number. You can also enter a Reason for Calling (optional).
The Calling Number cannot start with a '+'. The Caller ID Name field has a limit of 32 characters and must not include special characters.
- If you want to add Caller ID text for other numbers in your organization, click Add New Row and repeat the preceding step. You may add up to 100 rows to one order. Click Submit.
- In the terms window, read the agreement, select I agree, and click Submit.
You should receive an email confirmation for your order.
Advanced Caller ID Disclaimer
Advanced Caller ID is provided on a best‑effort basis and may not always display as intended. Due to industry‑wide consumer‑protection regulations, carriers and mobile providers have the right to block, filter, or reclassify calls based on their own analytics and spam‑prevention policies. As a result, the presentation of your caller ID—including name, number, or call labeling—may vary by network, device, or consumer settings. NiCE has no control over how third‑party carriers or end users choose to handle incoming calls, and therefore cannot guarantee caller ID delivery or accuracy in all scenarios.


