Customer Integration Tasks
SIP Trunk Integration in Cisco Environments
The information in this section is provided for your reference only. Detailed steps for Cisco configuration can be found in Cisco’s documentation, which is available on the Cisco website. You should always use the appropriate documentation from Cisco to install and configure Cisco components.
Instructions in these tasks assume that that your Cisco environment uses the default settings. You should note any non-default settings and discuss them with your Uptivity Installation team.
Most of the instructions in this section are based on CUCM Administrator v9.1. Other versions may have different settings.
Uptivity supports buddy core failover/resiliency, in which multiple trunks are configured on the CUCM and added to a route group. A route group can be added to a route list, and the route list would be selected inside the route pattern instead of pointing it directly at a trunk. For detailed information on configuring these specific items, refer to the Cisco Unified Communications Manager Administration Guide.
inContact strongly recommends that administrators performing the configuration tasks for any Cisco integration print the Customer Configuration Overview for Cisco SIP Trunk Integrations table and check each customer step as it is completed. You may also wish to print each configuration task and check each step in the procedure as you complete it. The majority of Uptivity deployments which experience initial errors do so because of a Cisco setting being missed.
If you are combining the SIP trunk integration with an additional CTI integration, complete the customer procedures for this integration first. Then complete the tasks in the additional appropriate guide(s).
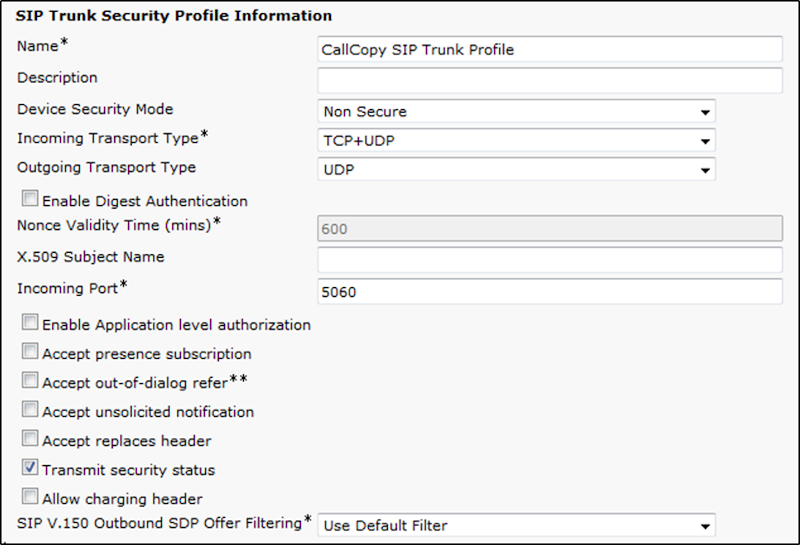
Configure a SIP Trunk Security Profile for the Cisco Recording Trunk
inContact recommends creating a separate SIP trunk security profile for the trunk between the CUCM and the Uptivity server. This profile prevents changes made to other security profiles from interfering with call recording. Since changing security settings requires a restart of any trunks using these settings, creating a separate security profile also minimizes the need to reset existing SIP trunks.
- Log in to the Cisco Unified CM Administration portal with an administrative account.
- Click System
 Security SIP Trunk Security Profile.
 - Click Add New.
- Enter a Name and a Description for this trunk.
- For Device Security Mode, select Non Secure from the drop-down list.
- For Incoming Transport Type, select TCP+UDP from the drop-down list.
- For Outgoing Transport Type, select UDP from the drop-down list.
- Do not select (or clear if selected) the check box for Enable Digest Authentication.
- Leave all other settings at their default values.
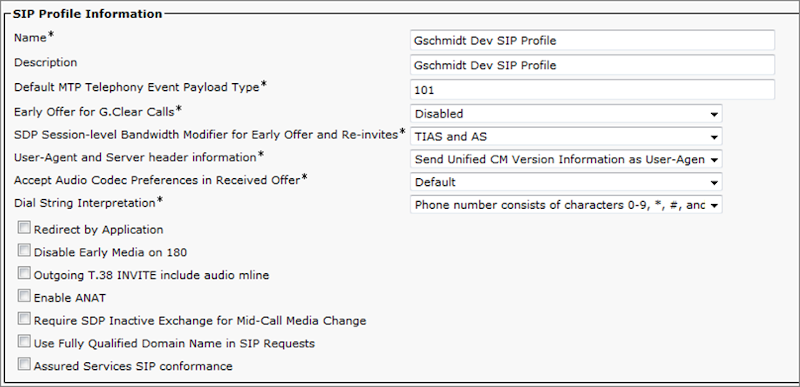
Configure a SIP Profile for the Cisco Recording Trunk
inContact recommends creating a separate SIP profile for the recording trunk, which protects it from changes made to SIP profiles for other trunks. All SIP devices using this profile must be restarted before any changes will take effect. This SIP profile should use the default settings shown in the images included in this section. If any settings in your SIP profile do not match, discuss this with your Uptivity Installation team.
- Log in to the Cisco Unified CM Administration portal with an administrative account.
- Select Device Device Settings SIP Profile.
- Click Add New.
- Enter a Name and Description for the SIP profile.
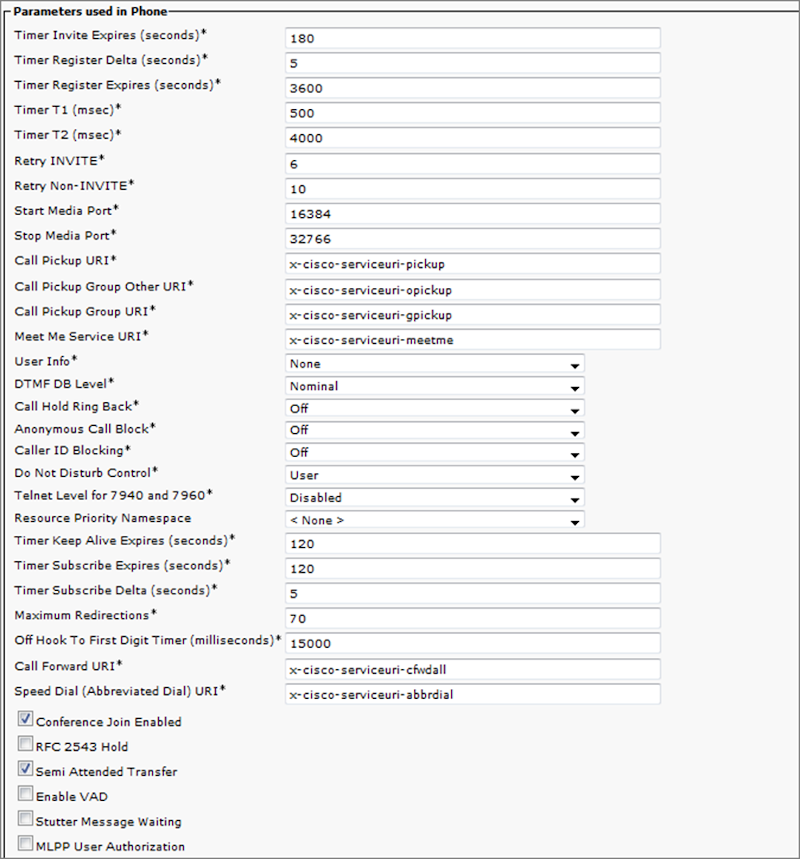
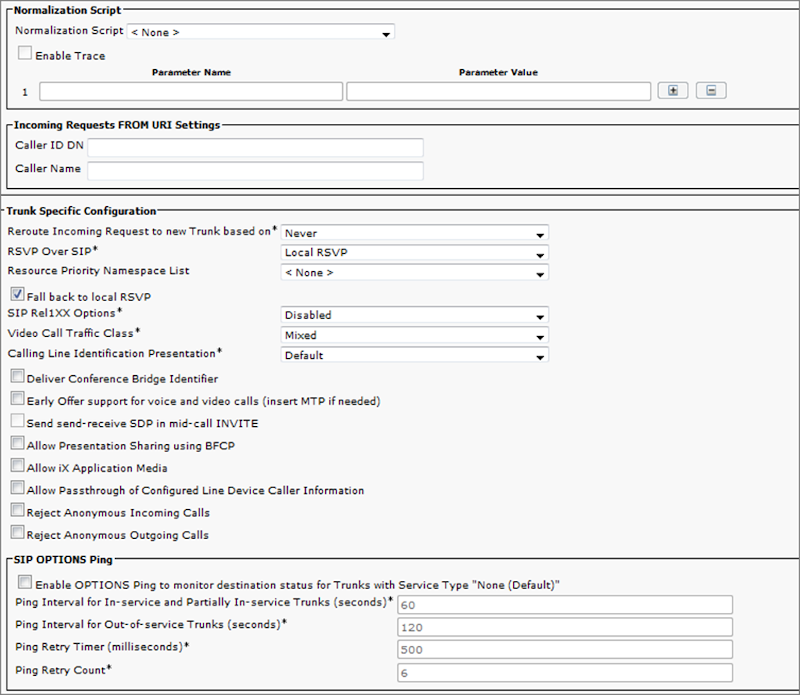
- Verify the settings as shown in the following three images and then click Save.
Create a Cisco SIP Recording Trunk
- Log in to the Cisco Unified CM Administration portal with an administrative account.
- Select Device Trunk.
- On the Find and List Trunks page, click Add New.
-
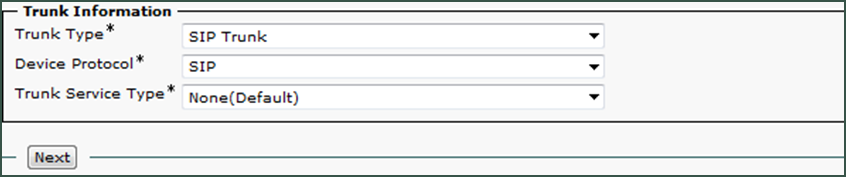
On the Trunk Information section of the form, configure the settings as shown in the following image.
-
Click Next to continue.
-
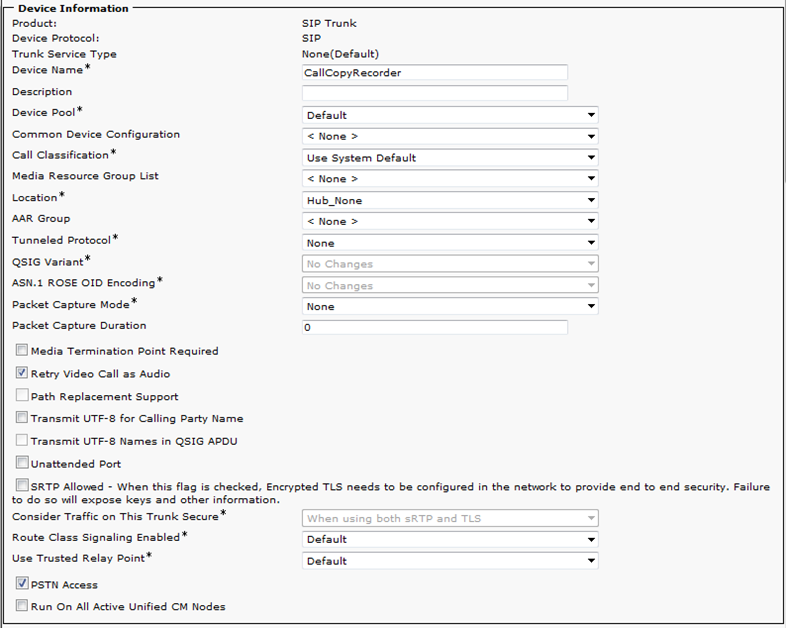
Enter a Device Name.
-
For Device Pool, select Default. Unless otherwise specified, the default settings on the Trunk Configuration page can be used. Make a note of any differences between the defaults shown in this image and the settings in your environment.
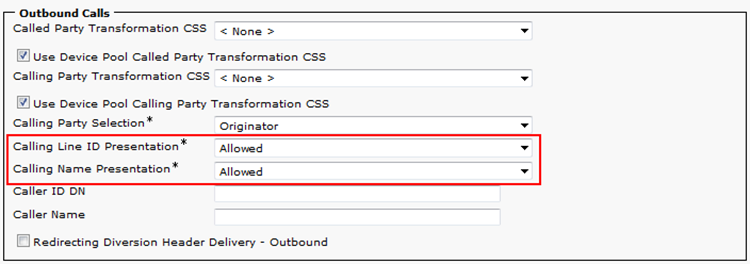
- In the Outbound Calls section of the Trunk Configuration page, the following options should be configured:
- Calling Line ID Presentation: Set to Allowed.
- Calling Line Name Presentation: Set to Allowed.
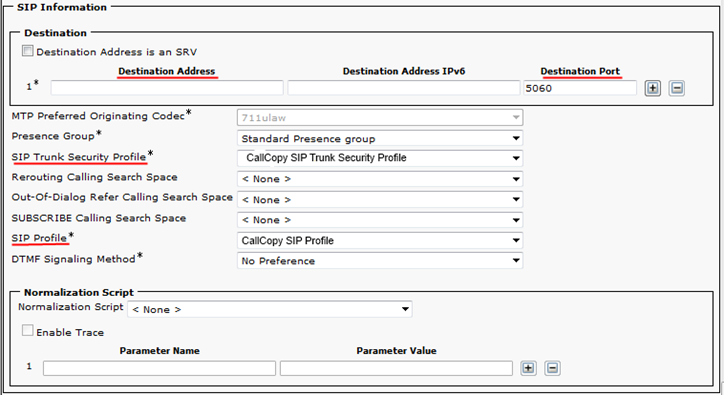
- In the SIP Information section of the Trunk Configuration page, the following options should be configured:
- Destination Address — IP address of the Uptivity server where the Uptivity Cisco Active Recording module is installed
- Destination Port — should be set to 5060
- SIP Trunk Security Profile — should be set to the profile configured earlier
- SIP Profile — should be set to the profile set earlier
- Click Save.
- Reset the SIP trunk.
Configure Cisco Phones
If there are Cisco phones to be recorded with this integration, they must support and be configured for automatic call recording. You will typically need to run a query to locate devices you wish to record. Queries can be run against many parameters, such as the Device Name or a particular Directory Number associated with a device.
- Log into Cisco Unified CM Administration with an appropriately-permissioned account.
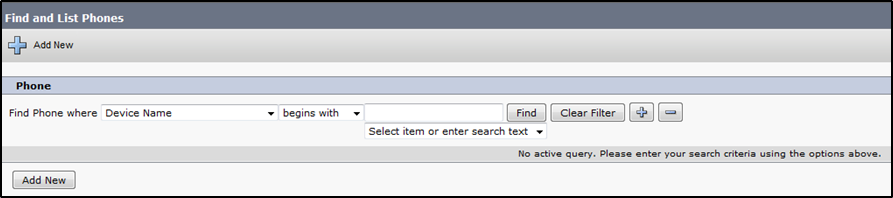
- Click Device Phone.
-
Enter the desired query parameters and click Find.
-
From the resulting list of phones, click the desired entry in the Device Name column.
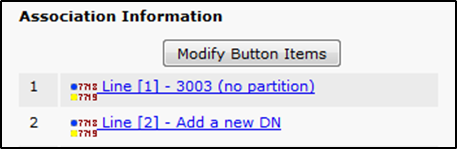
- Under Association Information, click the desired Line (extension).
-
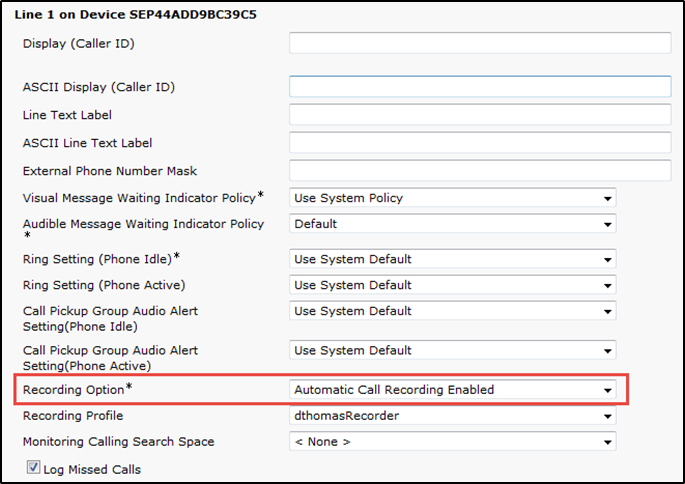
Scroll to the section labeled Line # on Device #.
- For Recording Option, select Automatic Call Recording Enabled from the drop-down list.
- Repeat this procedure for any lines that will be recorded.
|
|


