The information in this section is provided for your reference only. Detailed steps for the Avaya configuration can be found in Avaya’s documentation, which is available on the Avaya website. You should always use the appropriate documentation from Avaya to install and configure Avaya components.
Complete these tasks as part of the integration of Uptivity with Avaya DT-SO.
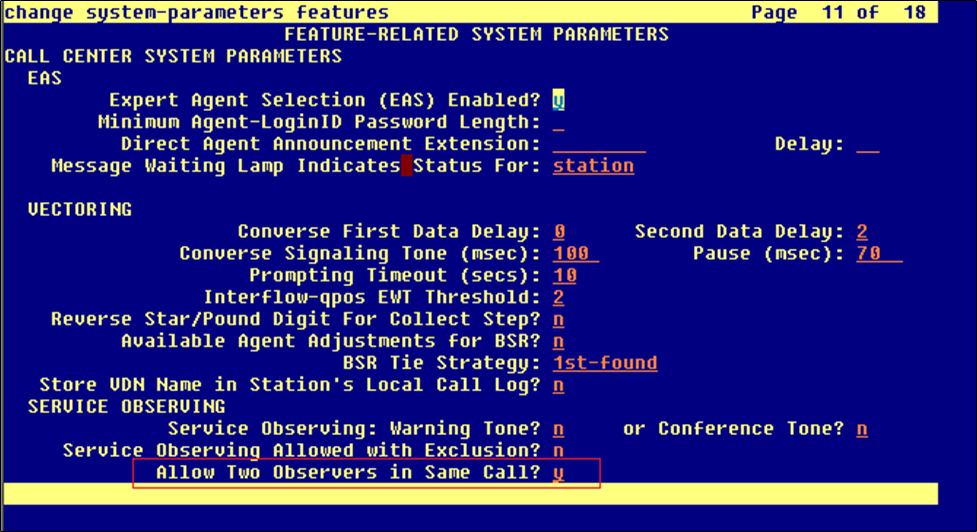
Set Call Center System Parameters
Sometimes Uptivity needs to observe and make two recordings for a single call (for example, agent-to-agent calls, conference calls with more than one participating agent, and so forth).
-
Log in to GEDI with an account with the appropriate permissions.
- Enter the command: change system-parameters features
- On page 11 of the display, verify that Allow Two Observers in Same Call? is set to y.
Enable Service Observing
This integration uses the SO feature on the Avaya CM.
-
Log in to GEDI with an appropriately-permissioned account.
- Enter the display system-parameters customer-options command to open the CM System Parameter Customer-Options screen.
- Verify that Service Observing (Basic) and Service Observing (Remote/By FAC) are both set to y.
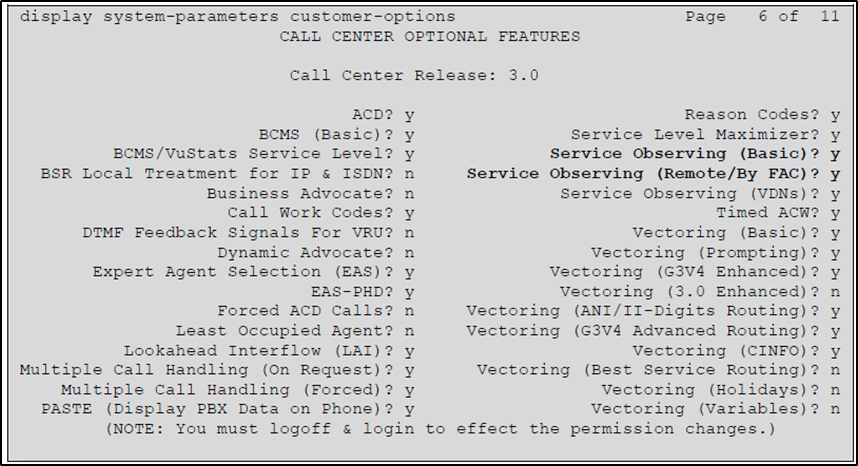
If these fields are not enabled, contact your Avaya representative for information on how your installation was initially configured.
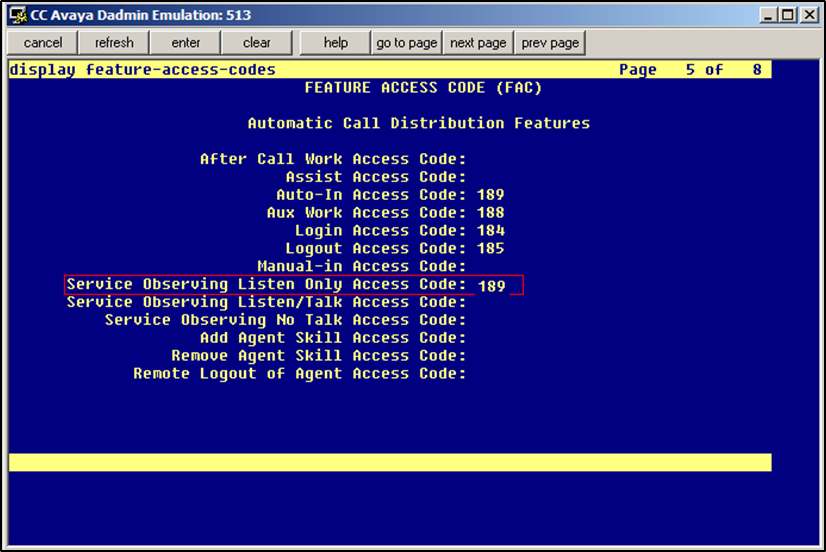
Set a Service Observe Feature Access Code
When supervisors perform a service observe, they must enter an access code. Uptivity must be configured to use this access code as well. You must set the Service Observing Listen Only Access Code for the Avaya CM and provide this code to your Uptivity installation team.
-
Log in to GEDI with an account with the appropriate permissions.
- Enter the command: change feature-access-codes
- Enter a code for Service Observing Listen Only Access Code (in the example image in step 1, the code is 189) and provide this number to the Uptivity installation team.
Create a Class of Restriction (COR)
You must assign a class of restriction to each trunk group to allow it to issue the Service Observing code.
- Log in to GEDI with an account with the appropriate permissions.
- Enter the command: change cor [n] to create a COR ([n] can be any number).
- Enter a description.
- Set Can Be a Service Observer to y.
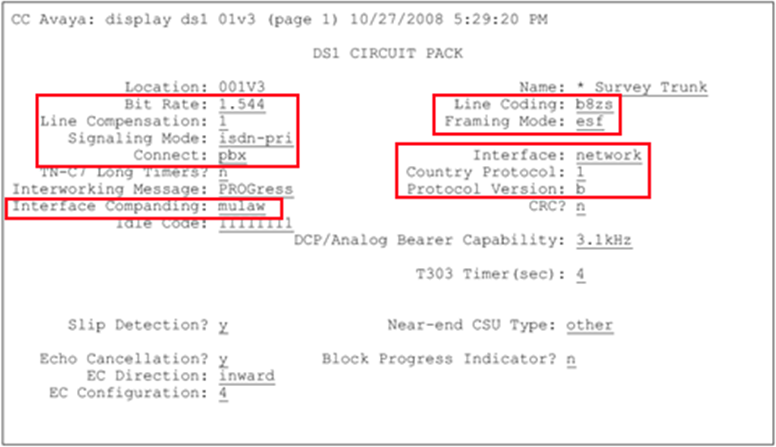
Configure the DS1 Circuit Pack
-
Log in to GEDI with an account with the appropriate permissions.
- Enter the command: display ds1
- Verify that the settings match those shown in the image in step 1.
- Make a note of the settings and provide them to your Uptivity installation team.
Configure the Trunk Group
You must perform this task for all trunk groups to be recorded.
- Log in to GEDI with an account with the appropriate permissions.
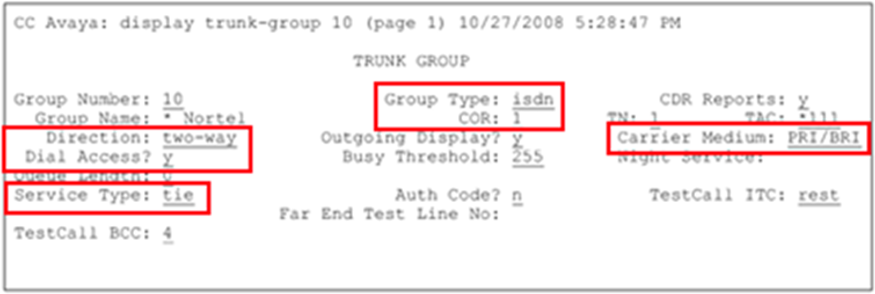
- Enter the command: display trunk-group [n], where [n] is the number of the applicable trunk group.
-
On page 1 of the display, configure the settings as shown in the example image in this step. For COR, enter the ID you configured in Create a Class of Restriction (COR).
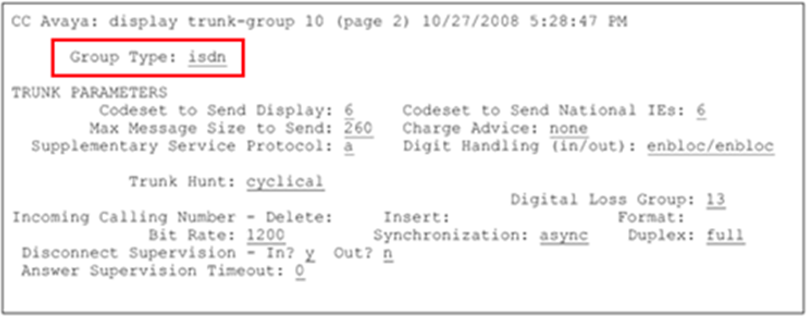
-
On page 2 of the display, verify that Group Type is set to isdn .
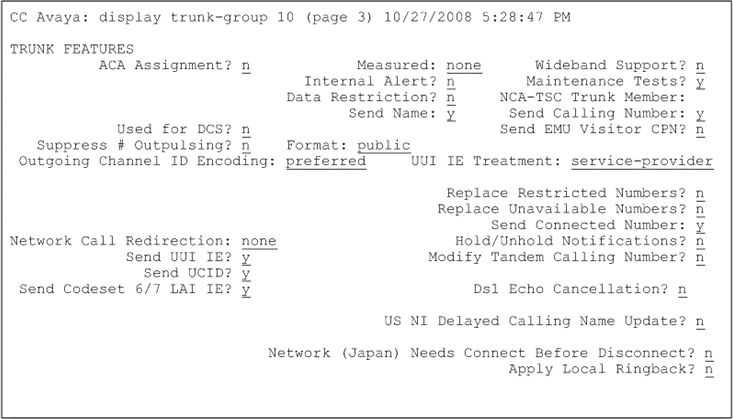
-
On page 3 of the display, verify all settings are as shown in this image:
Configure the Trunk Signaling Group
- Log in to GEDI with an account with the appropriate permissions.
-
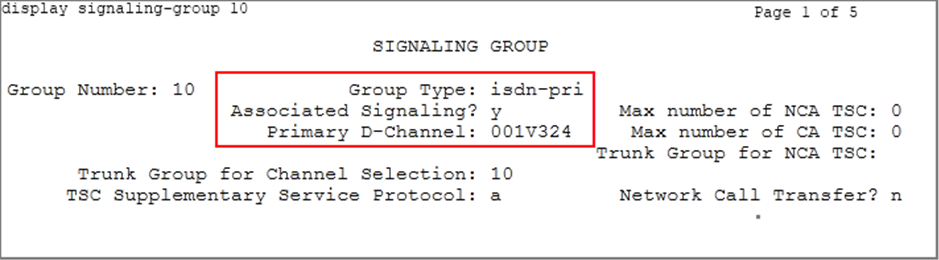
Enter the command: display signaling-group [n], where [n] is the number of the applicable trunk group.
- For Group Type, enter the value: isdn-pri.
- For Associated Signaling, enter the value: y.
- For Primary D-Channel, the value must match channel 24 on the card used in the add ds1 command when you configured the T1 board.
- For Trunk Group for Channel Selection, the value should match the trunk group number used in the add trunk group [n] commands.
- Make a note of the settings and provide them to your Uptivity installation team.
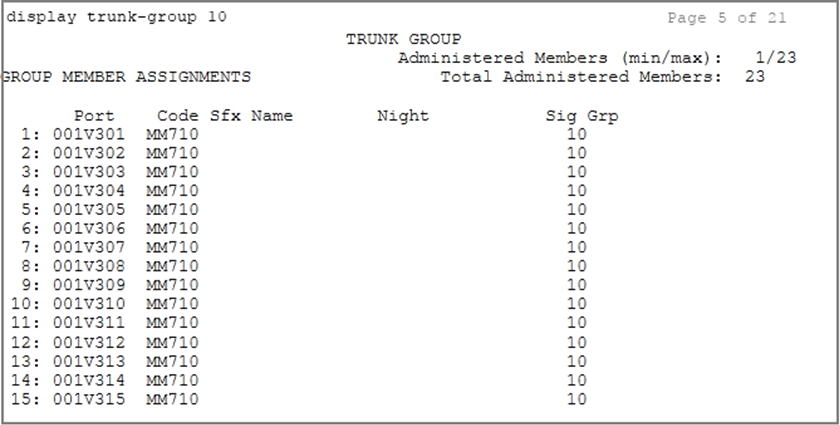
Configure the Trunk Group Channels
- Log in to GEDI with an account with the appropriate permissions.
- Enter the command: display trunk-group [n], where [n] is the number of the applicable trunk group.
-
On the first page of the trunk group channels (as shown in the image after this step), verify that channels 01-23 on the board used are entered under Port and that Sig Grp matches the signaling group number for the trunk.
- Make a note of the settings and provide them to your Uptivity installation team.
|
|
|


