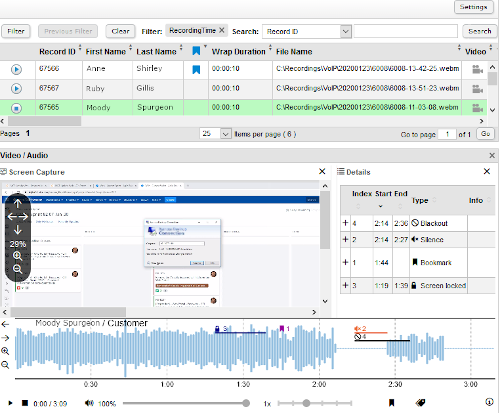
The HTML5 Media Player enables you to play recordings from the Recorded Interactions list. It opens automatically when you play a recording. By default, it opens in the same window and tab as the Recorded Interactions list, but you can choose to open a recording in a new window, and you can change the default behavior.
The Media Player has three panes that display different information about a recorded interaction:
- Video/Audio pane—Displays the audio portion of a recorded interaction with a waveform display that shows you a visual representation of the sounds and voices recorded during the call and includes a set of controls and other options that you can use when playing the recording.
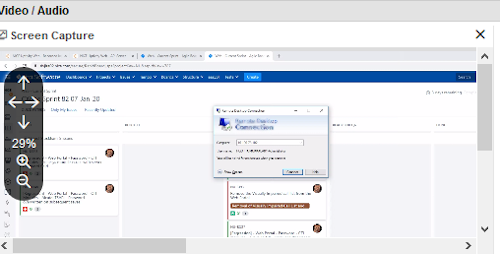
- Screen Capture pane—Displays the video portion of recordings, if your organization uses NICE Uptivity Screen Recording. This pane includes a set of controls so you can zoom in and out on the video. If your organization does not use NICE Uptivity Screen Recording, you can hide the Screen Capture pane by clicking the X in the upper right corner of the pane.
- Details pane—Displays information about any events that have been tagged in the recording. If this pane is empty, the recording doesn't contain any tagged events.
Open the Media Player
- In the NICE Uptivity Web Portal, click Interactions List.
- Click the Play icon next to a recording. The Media Player opens in the same browser window below the Recorded Interactions list.
- If you want to open the player in a new browser window, pause or stop the playback, then right-click on the recording in the Recorded Interactions list and click Play → In New Window.
Use the Video/Audio Pane
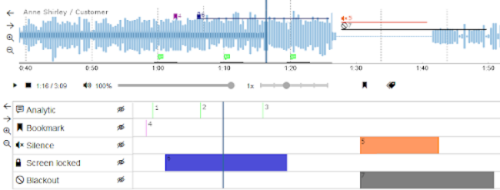
The Video/Audio pane gives you controls for playing a recording similar to a standard media player. It shows you a waveform display for the recording, which gives you a visual representation of the audio portion of the call. If a recording contains any events such as screen locks or crosstalk, Uptivity tags those events and displays them in the waveform. You can see additional information about these events in the Swimlanes![]() The group setting in your ACD/PBX (for example, hunt group, skill group, or labor group). and in the Details pane.
The group setting in your ACD/PBX (for example, hunt group, skill group, or labor group). and in the Details pane.
- If the Media Player is not already open, click the Play icon next to a recording in the Recorded Interactions list to open it.
-
Click the Play icon (located on the control bar beneath the waveform display) if the recording doesn't automatically start to play.
Learn more about the options on the Video/Audio pane.
Field
Description
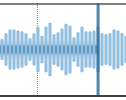
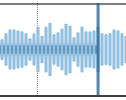
The waveforms corresponding to the audio activity during the recorded interaction. If a recording has no audio, such as for chat interactions, the waveform will be flat. 
Click the Volume icon to mute the playback, and slide the volume bar left or right to change the volume. The Media Player volume control is limited by the master volume level set in your Windows audio settings. You may need to adjust the master volume settings to make the Media Player controls effective.

The played time indicator (current point in time : total duration of call). Times displayed in HH:MM:SS format. 
Click and drag left or right to increase or decrease the speed at which the Media Player plays the call. 
The Bookmark icon appears if you have permission to bookmark calls. Click to add an internal bookmark to the recording.

Click to toggle the Swimlanes, which display information about the color coded tags that appear in the waveform. Not all recordings will have tags. -
Click
 to display the Swimlanes and see information about the tagged events in the recording, if there are any. Learn more about the Swimlanes and the event tags.
Each event is represented in the waveform display and the Swimlanes by a color-coded icon, and some have a corresponding bar that shows the length of the event during the call. The icons and bars each represent a unique instance of an event, and the number of each event corresponds to an entry in the Details pane, where you can find any additional information about the event.
Icon
Description

Indicates moments in the call that match keywords or phrases that the speech analytics feature has been configured to tag, if your organization uses this feature. 
Indicates where a blackout was applied to the recorded interaction. 
Indicates where bookmarks have been added to a recorded interaction.
External bookmarks appear at the beginning of the recording, while internal bookmarks appear at the location they pertain to.

Indicates crosstalk, where both people on a call were speaking at the same time. 
Indicates where a segment of video is missing from the recording. 
Indicates where Uptivity detected silence during a recorded interaction, if your system is configured to detect silence.

Indicates where Uptivity detected that the agent's screen was locked during the recorded interaction. 
Click to hide all instances of the type of tagged event in the waveform display and the Details pane. Click the hide icon again to make the events visible. 

Click to zoom in or out on the Swimlanes. You can use this to help you locate a specific moment in the call. 

Click to slide the Swimlanes left or right across the display. -
Click and drag the playback marker (the vertical dark blue line) left or right in the waveform display to start the call playback from a different location.
-
Use the controls on the left side of the waveform display to zoom or pan through the audio waveform.
-
If you want to view the waveform display in a larger form, close the Details pane and the Screen Capture pane. You can open the hidden panes by clicking the icons for each one at the top of the Video/Audio pane.
Learn more about the fields in this step
Field
Description

Click to open the Details pane. 
Click to open the Screen Capture pane.
Use the Details Pane
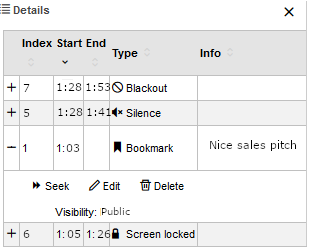
The Details pane shows you information about each tagged event in the recording you are playing back. The tagged events are indicated by color-coded icons in the waveform display in the Video/Audio pane.
- If the Media Player is not already open, click the Play icon next to a recording in the Recorded Interactions list to open it.
- Locate the Details pane.
- Click any of the column headings to sort the table by that column. Learn more about the fields in this step

Field
Description
+ Click to expand the tagged event details and see additional information and options. The additional information shows you the visibility of the tagged event (public or private).
Depending on the type of event, the options available to you vary. Options can include:
- Seek—Click to move the playback indicator to the start of the selected event.
- Edit—Click to edit details about the tagged event.
- Delete—Click to remove the event tag.
Index The number assigned to each event tagged in the recording. The number matches the event's icon in the waveform display and in the Swimlanes, both of which are located in the Video/Audio pane. Start The start time of the tagged event. End The end time of the tagged event. Type The type of event:
- Analytic—Phrases said during the recorded interaction that match Uptivity speech analytics tags.
- Bookmark—Places in the recorded interaction where a user placed a bookmark.
- Crosstalk—Times when both people on the call are speaking at the same time.
- Missing Video Segment—Places where a section of the video is missing from the recording.
- Silence—Periods of silence during the recorded interaction.
- Screen locked—Times when the agent's screen was locked during the recorded interaction.
- Blackout—Periods when part of the call was blacked out for to protect private information.
Info Details about the tagged event, if any. - If you want to view the Details pane in a larger form, you can resize the Details pane or close the Screen Capture pane.
Use the Screen Capture Pane
The Screen Capture pane shows the agent's desktop as recorded by the Uptivity Screen Capture Client during an interaction. If your organization does not use this feature, or if a particular recording does not include screen recording, this pane will be empty. You can close the Screen Capture pane to hide it.
- If the Media Player is not already open, click the Play icon next to a recording in the Recorded Interactions list to open it.
- Locate the Screen Capture pane.
- Click and drag anywhere on the image in the video pane to view a different part of the captured screen, or use the zoom icons and the arrows to adjust the view.
- If you want to view the screen capture pane in a larger form, you can resize the pane or close the Details pane. Click the
 to reopen the Details pane.
Customize the Media Player
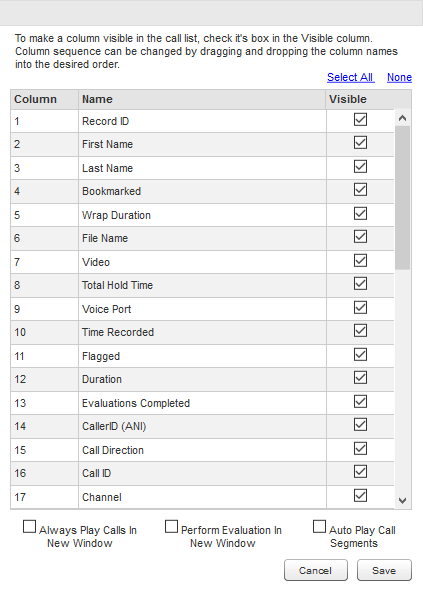
- Click Settings in the upper right corner of the Recorded Interactions page.
- At the bottom of the Settings dialog box, select or clear the applicable checkboxes and then click Save.Learn more about the fields in this step

Field
Description
Always Play Calls in New Window Select if you want recordings to open in a new window by default when you click the Play icon on the Recorded Interactions page. Perform Evaluation in New Window Select if you want the evaluation page to open in a new window by default when you perform an evaluation from the Recorded Interactions page. Auto Play Call Segments Select if you want Uptivity to automatically play the next call segment. Applies only if the recording integration and system configuration support call segments.
