Install the NICE Uptivity Screen Recording Client
NICE Uptivity Screen Recording provides the ability to record agent workstation activity and to view agent desktops in near-real time.
This topic explains how to install the NICE Uptivity Screen Recording client application on a workstation.
For more information, see NICE Uptivity Screen Recording Overview.
The NICE Uptivity Screen Recording Client installer can be obtained from any Uptivity server by browsing to the C:\Program Files (x86)\CallCopy\Installers\ folder. The application installer is named "Screen Capture Client Installer.msi".
The NICE Uptivity Screen Recording client can also be installed silently, with no user intervention required or allowed. The installer uses standard Windows Installer options available by running the "msiexec.exe" application. For more information, see Silent Installation Settings for Uptivity Client Applications.
- Copy the installer to the workstation and double-click the installation MSI file.
- Click Next.
- Select the checkbox to accept the License Agreement and click Next.
- On the Custom Setup page, set the directory for the client software installation.
- Optional: To verify the workstation has enough disk space to install the software, click Disk Usage.
- Click Next.
-
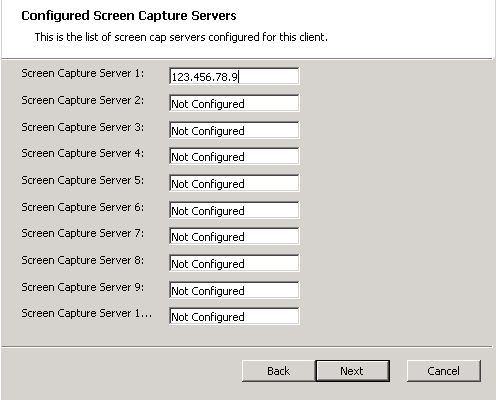
Type the IP addresses of all screen recording servers for the location where the client workstation resides and then click Next. If more than 10 servers exist in a location, you must adjust the INI file that contains client settings. See NICE Uptivity Screen Recording Client Settings.

- Click Install.
- When the status bar indicates installation is complete, click Next and then click Finish.
- Navigate to and double-click the file CC_ScreenCapClient.exe to start the client application (or reboot the workstation).