Apply Manual Blackouts to Recordings
Required Permission — Allow Player Blackout
Overview
Blackouts are usually handled during the original interaction by the Uptivity application or by an agent using NICE Uptivity On-Demand.
This topic explains how to apply a manual blackout to a completed recording.
For more information, see Working with Recordings Overview, Blackouts Overview, or both.
Manual blackout functionality is not available in the HTML5 Interaction Player.
Manual blackouts result in deletion of audio and video information from the file in the system, or a "soft blackout." Soft blackouts are not backed up to the hard drive, so the file on the hard drive does not contain the blackout.
- Follow the procedure for Play Recordings.
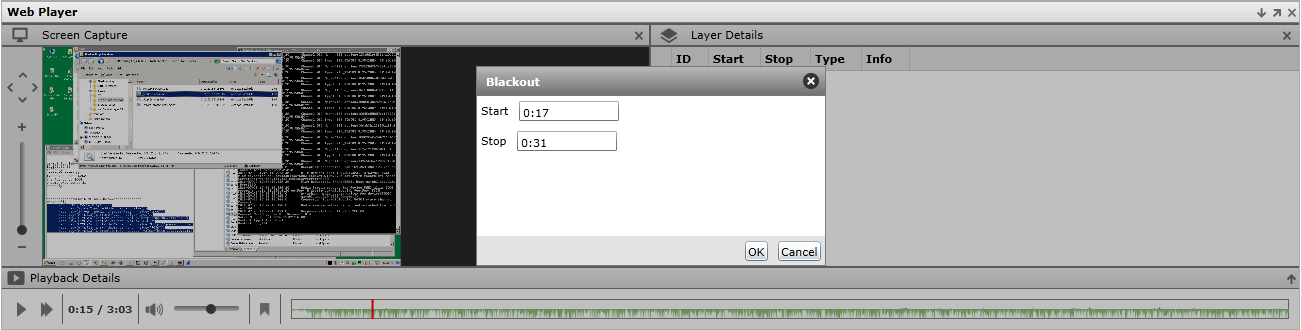
- Note the start and end times of the portion to be blacked out as shown in the waveform display.
- Right-click in the waveform display and drag to select an area of the recording.
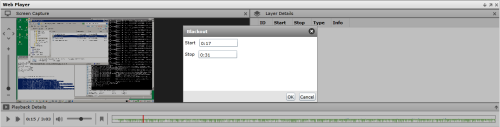
- In the Start field, enter the time at which the blackout should begin.
- In the Stop field, enter the time at which the blackout should end.
- Click OK, and then click OK again to confirm the blackout.
See Also
- Finding Recordings Overview — for more information on locating specific recorded interactions
- Web Player — for more information on the waveform display in the Web Player interface.