Create Recording Schedules for a Period of Time
Overview
Schedules are collections of business rules that govern recordings in Uptivity.
This topic explains how to create a schedule that will record all calls for a single agent for a specified period of time.
For more information, see Recording Schedules Overview.
Recording schedules require you to set an archive action. Therefore, you should create archive actions before schedules. See Create Archive Actions.
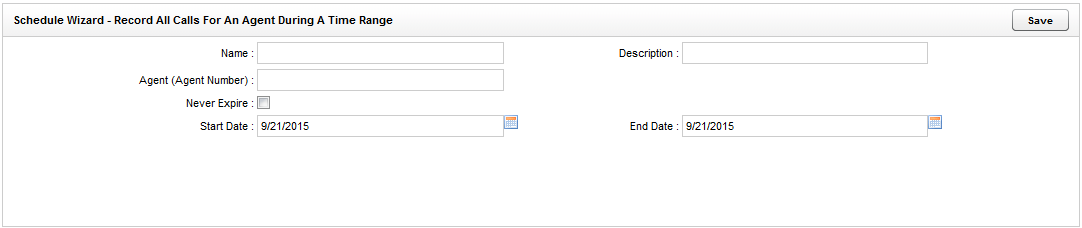
- In the NICE Uptivity Web Portal, click AdministrationSchedulingCreate Schedule.
- Click Record All Calls For An Agent During A Time Range.
- Type a Name for the schedule.
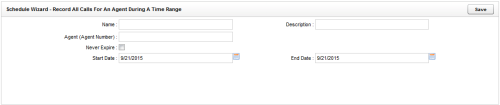
- Optional: Type a Description for the schedule.
- In the Agent Number field, enter the phone ID for the agent to be recorded.
- Use the date and time selectors to specify a Start Date and an End Date for the period during which Uptivity will record calls for this schedule.
Do not use the Never Expire checkbox for this type of schedule.
- Click Save.
See Also
- New/Edit Schedule Page — for information on the criteria and parameters that can be configured on this page